
I recently bought home a thunderbolt display so I could use it as a power adaptor to reimage an old Macbook Air.
The first hurdle was for some reason internet recovery – the option and R on boot method just booted saying startup disk not available so I had to get an image of Catalina so I could start the image process without relying on that option. Thanks to this tutorial https://www.tonymacx86.com/threads/gibmacos-tutorial-how-to-download-macos-directly-from-apple.295248/) I was able to make a bootable USB.
So I fired it up and realised I only had 21% battery life left
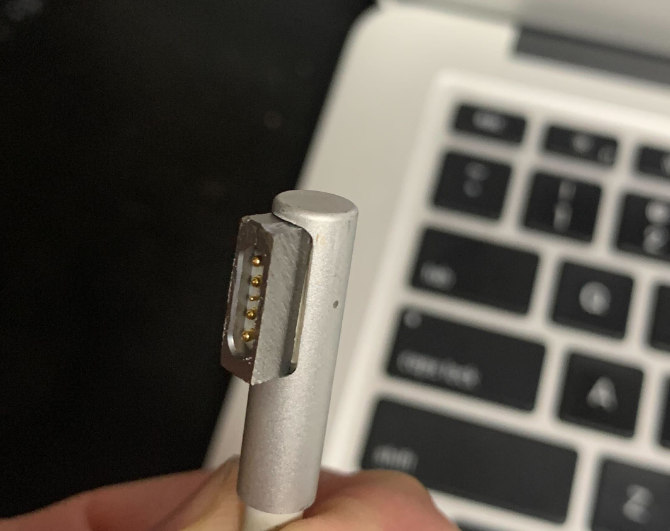
No big deal I thought, I’ll just plug the thunderbolt displays power on to it and we’ll be right to go…. WRONG….. the Thunderbolt display uses Magsafe 1 whereas the Macbook Air I was imaging uses Magsafe 2…
So as any normal person does I went to the almighty Google and searched for ways of resolving that issue and stumbled across this https://www.doktorsewage.com/modify-apples-magsafe-2-into-magsafe-1/#:~:text=MagSafe%201%20can%20be%20ground,a%20later%20MagSafe%202%20port
Instead of using a dremel I used pliers to break the outer shroud off the Magsafe 1 connector from the display and got out my trusty file.
I placed the small shroud in my vice and then slowly worked at grinding down the long sides of the Magsafe 1 shroud.
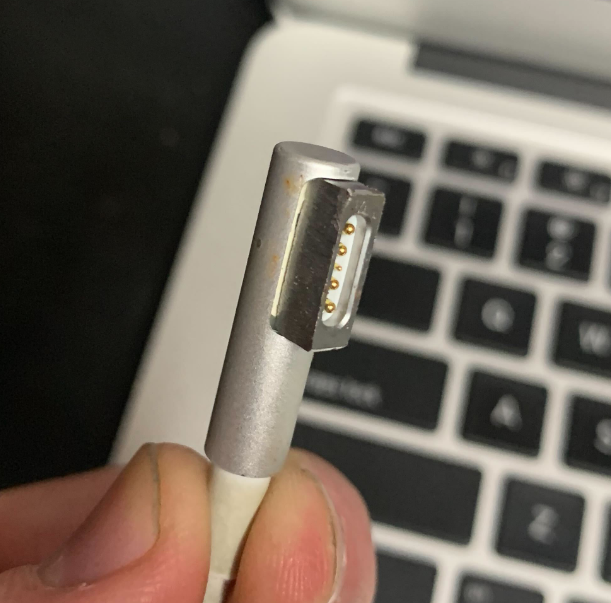
It surprisingly didn’t take all that long to do, I ground down one side and then turned and worked the other side and each time test fit the connector into the Macbook air. Once it did I then placed the shroud back around the magsafe pins and pressed back on carefully with pliers.
The result….
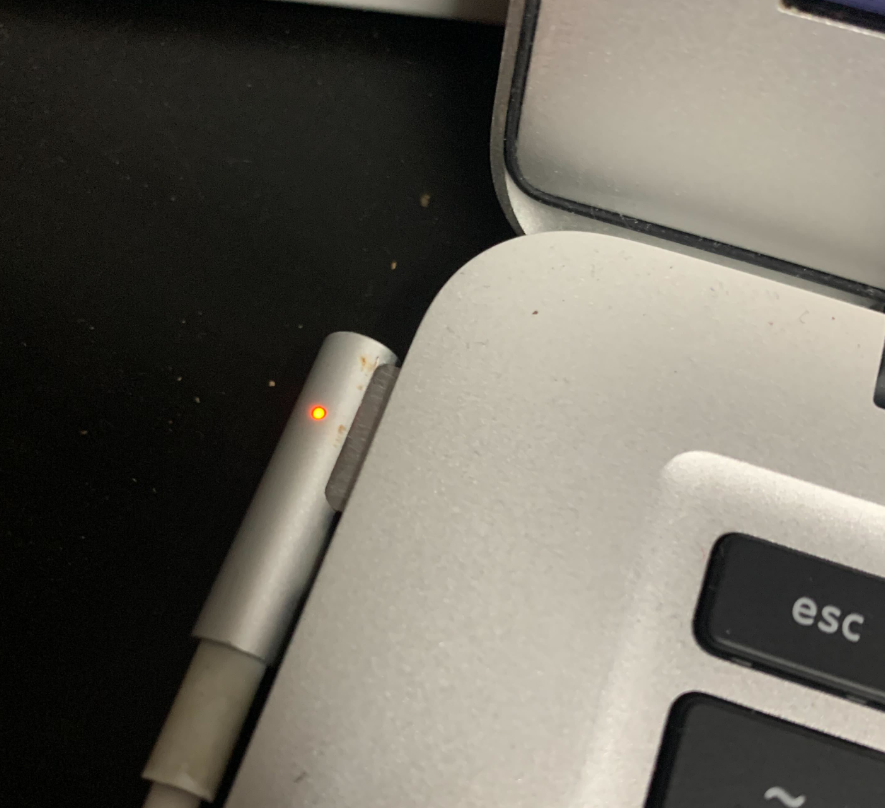
It actually works!
Hopefully this will help someone that may be in the same predicament.
Website comments are disabled but if you’d like to reach out feel free to contact me on Twitter

